
Installing / Replacing Batteries for the CelloEye RF Detectors
Due to new ( 2026) shipping regulations, we have no option but to send the detectors without batteries. You would need to locally buy and install the batteries yourself.
In addition, once every few years of operation, the battery will need to be changed.
This is the guide on how to do it.
Video of the replacement at the link – https://www.radmeters.com/video/CelloEye-24G/Replacing_battery_CelloEye-24G.mp4
Disassembly
- Turn the radiation detector over so that the LED\LEDs are facing the floor\table.
- Locate the screw at the bottom of the back of the detector.
- Unscrew the screw with a small Phillips screwdriver.
- Remove the screw.
- Turn the detector back over so that the light is facing you.
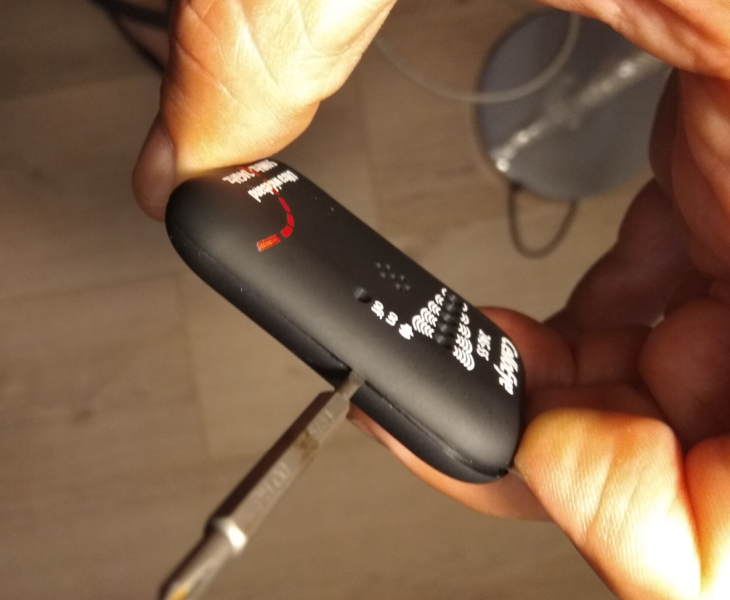
- Insert a small flat-head screwdriver (size 1 or 2) between the two parts of the detector, right next to the detector’s power button.
- Use the flat-head screwdriver to carefully separate the two plastic parts of the detector’s casing.
- Once the plastic parts separate, the detector’s electronic circuit board will be revealed.”
Battery Replacement
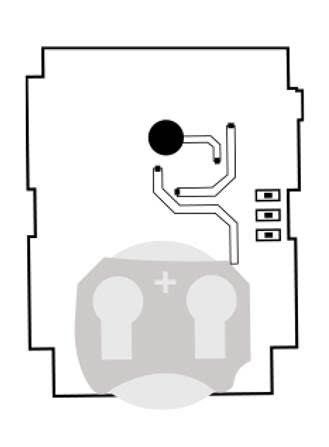
- At the bottom of the electronic circuit board, you will find the 2032 type battery.
- Use the flat-head screwdriver to push it downwards and out of the battery holder.
- Replace it with a new battery.
- Check that the detector is working (turn it on).
- Close the plastic parts.
Closing the Detector
- Place the plastic parts facing each other.
- Make sure that the detector’s button fits through the hole in the plastic part facing the user.
- Begin snapping the two plastic parts together, starting from the area where the button is located.
- Be very careful not to break the button.
- Once fully closed, screw the Phillips screw back in.”